This post contains affiliate links. I may earn a commission if you shop through them, at no extra cost to you. As an Amazon Associate I earn from qualifying purchases.
A pop star birthday menu does not need eleven themed desserts to feel like a celebration. A cake with a clear color story, a few easy foods guests will eat, and a table that is simple to serve from can do far more for the party than a long list of clever snack names.
For this Eras-inspired birthday, lavender, hot pink, and silver connect the food display to the rest of the room. Here is how to turn the dessert and pizza-table inspiration into a practical menu and serving plan, with options for a smaller setup.
The images below are AI-generated design concepts, not photographs of completed events or exact products. This is an independent fan-inspired party idea.
For the backdrop, welcome sign, outfits, and full room inspiration, explore our Taylor Swift-inspired pop star birthday party collection.
Choose the menu before you choose the stands
Start with the time of day. If the party overlaps lunch or dinner, plan a real meal. If it sits comfortably between meals, you may prefer a snack-and-cake party and make that clear on the invitation. Decide this before ordering serving pieces so the table has space for the food you actually need.
A straightforward meal-party menu could be pizza, a fruit option, water, birthday cake, and one extra treat. A between-meals version could be fruit, a savory snack, cupcakes or cake, and drinks. These are sample combinations to adapt to your guests, appetites, and dietary needs.
Ask families about food needs before finalizing the menu and keep ingredient information available. Avoid promising that a food is allergy-safe unless you can verify its ingredients and handling. A separate, clearly identified option is more useful than a decorative label that leaves parents guessing.
Build the dessert display around one hero

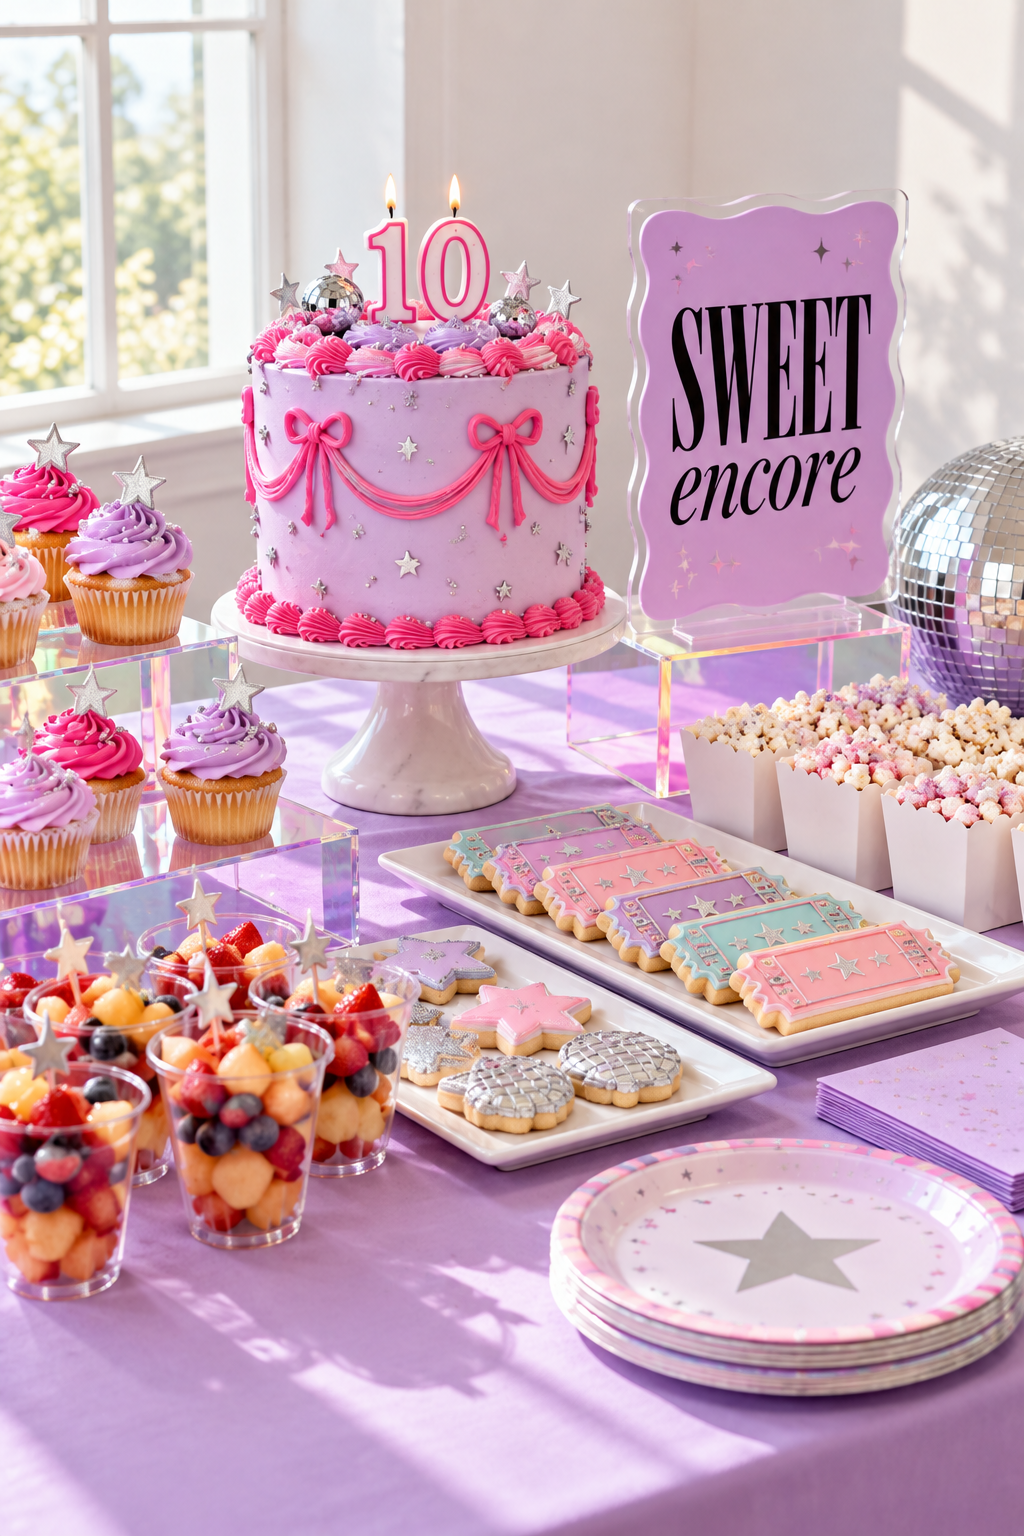
The cake is the focal point in this concept: lavender icing, strong pink piping, and birthday-number candles. The ticket cookies and cupcakes support it, but you do not need all three custom desserts to get a similar effect.
Choose one of these approaches. Cake-led: one decorated cake plus simple store-bought treats in coordinated wrappers. Cupcake-led: cupcakes grouped on a stable stand, with a small birthday cake if you want a separate candle moment. Cookie-led: a tray of ticket-shaped cookies beside a simple cake, letting the cookie design carry the concert theme.
When talking to a baker, describe the palette, serving needs, and the elements you like, rather than asking them to copy every detail in an AI image. The concept is a visual starting point; a real cake needs its own workable structure and food-safe decorations.
Use three heights without making the table hard to reach
Place the tallest focal piece toward the back, a medium-height treat to one side, and low trays or cups toward the front. That creates a clear picture without stacking every item on a pedestal. Keep the cake stable and easy for an adult to reach when it is time to serve.
Iridescent risers can repeat the silver sparkle of the room, but check whether a display piece is intended for direct food contact. Use suitable plates, trays, or food-safe liners as needed. Ordinary craft glitter and household mirror-ball decorations do not belong on food.
Keep the busiest decoration behind or beside the serving area. If a decorative disco ball takes the place where guests need to set down a plate, move it to a side surface. Photographing the table is easier when the display has a focal point, and using it is easier when the front stays open.
The collection’s Amazon Idea List was previously verified to include coordinating display and decorating finds. Browse it for the overall look, then check current dimensions, intended use, and product details before choosing pieces. The pictured cake, food, and styling objects are not exact product promises.
Make the easy food look intentional
Pizza: serve it as the meal instead of trying to turn every slice into a themed item. Put sturdy plates and napkins first in the serving route and leave room for an adult to help. Keep extra boxes on a nearby utility surface rather than stacking them behind the styled cake.
Fruit: choose a format that suits your guests and preparation time. Individual cups are convenient, while one platter uses fewer containers. Keep the color and freshness of the fruit as part of the display rather than adding non-food sparkle.
A savory snack: pick one familiar option that fits the group. Small cups can make portions easy to collect, but large decorative cones can be awkward to hold while guests are also carrying plates and drinks.
Drinks: plain water deserves an easy-to-find place. Put cups and a labeling pen beside it so guests can identify their own drinks. If you add a colorful party drink, make it an optional extra rather than the only choice.
Let the meal table carry some of the theme

The meal table in the original collection uses a slim silver runner, pink napkins, and star details. That repetition connects it to the dessert table while leaving the middle useful. Choose a few details guests will see at each place instead of filling the table with objects.
A simple setup might be a lavender table covering, pink napkins, coordinated plates, and a small name card. Reuse the same napkins at the dessert station. Keep large decorations out of guests’ sight lines so they can talk across the table.
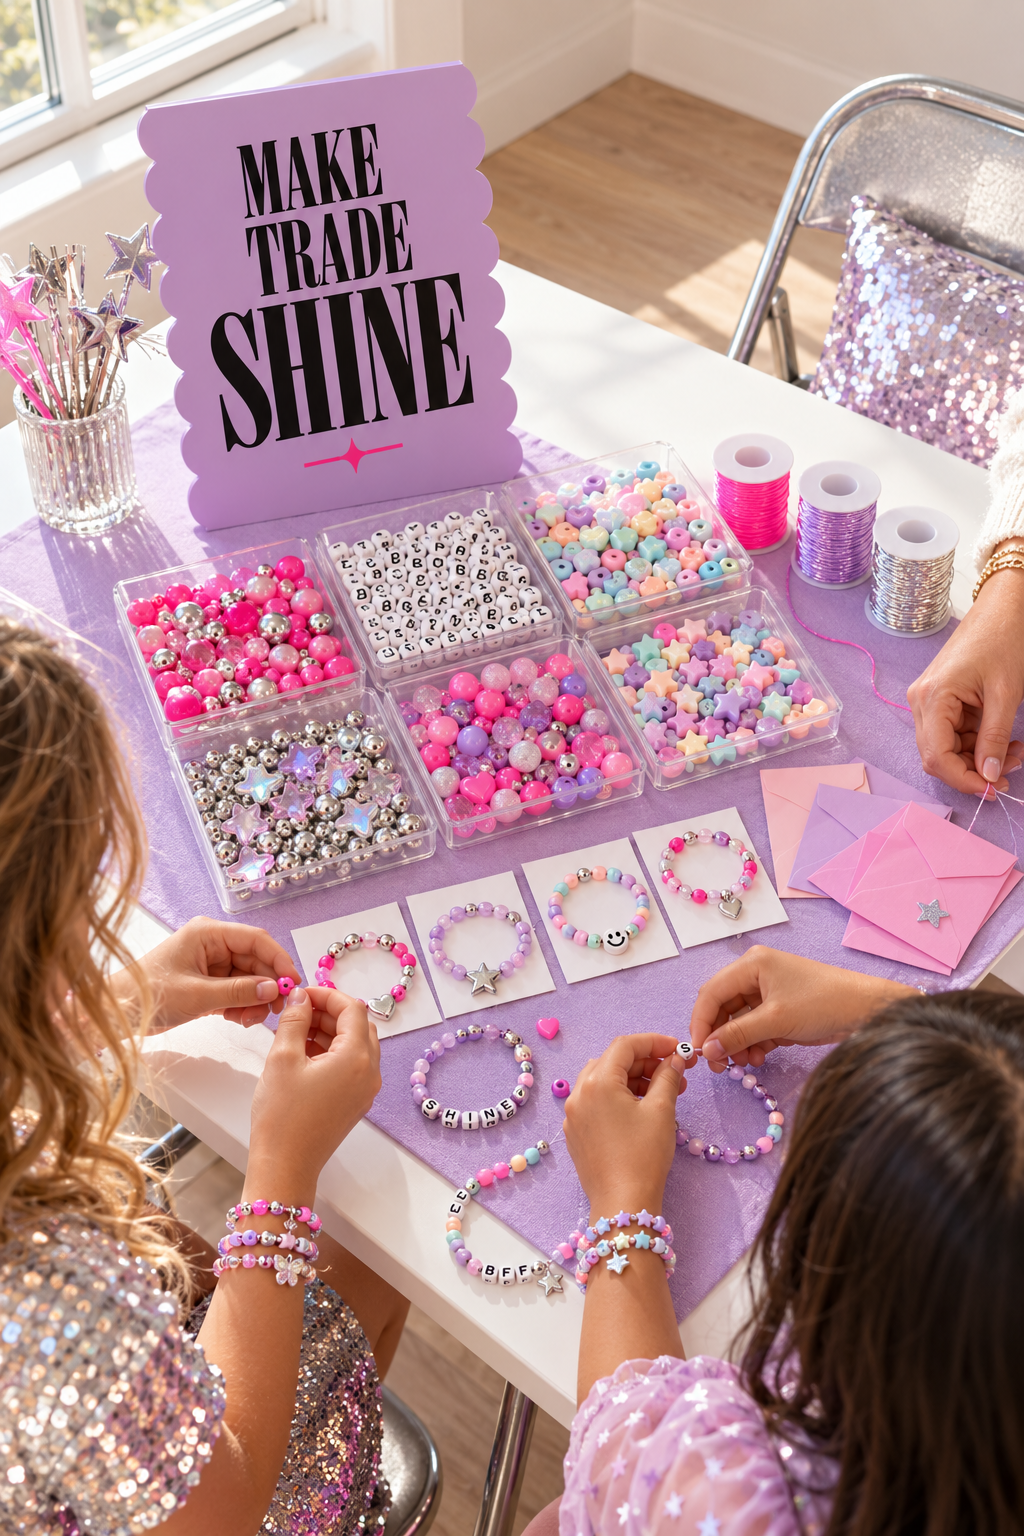
If the same table hosts bracelet making and food, plan the changeover. Close and remove bead organizers, collect unfinished projects into named trays, and clear the surface before serving. Do not make guests balance meal plates around open craft supplies.
Plan the refill route before guests arrive
Keep backup plates, napkins, serving utensils, and a trash bag together on a nearby surface that is outside the main guest route. Make sure you can refill the food without reaching over the cake or moving the centerpiece.
For a small party, one serving direction may be enough: plates first, food next, drinks at the end or at a separate station. A drinks table often works well away from the dessert display because spills and waiting guests then stay out of the cake area.
Put food out when it is time to eat rather than treating the styled display as a reason for everything to sit out through the entire party. Follow food packaging and handling guidance for the items you choose. Arrange your photo moment around service, not the other way around.
The smaller version still feels like a party
For a compact setup, use one cake or a cupcake display, one low snack tray, and a coordinated stack of plates and napkins. Add a small sign at the back and keep the rest of the theme in the room’s backdrop. You can make a clear visual statement on one end of a table without recreating a large dessert installation.
Choose the two details you care about most, such as the lavender cake and hot pink napkins, and repeat those choices. The menu can stay familiar. The theme comes from the editing and presentation, not from buying a custom version of every item.
Bring everyone together for the cake moment
Leave a clear place for the birthday child to stand or sit beside the cake, with room for friends to gather. Move loose decorations away from candles and let an adult handle lighting, serving, and any non-edible toppers.
Keep the plan focused on what makes the party enjoyable: enough food, a comfortable place to eat, and a birthday moment everyone can join. For the rest of the room, see the full collection; for coordinating decor, explore the shopping list below.
For the backdrop, welcome sign, outfits, and full room inspiration, explore our Taylor Swift-inspired pop star birthday party collection.



Leave a Reply